Your RV roof can face several common issues, including leaks, cracks, blisters, mold, and debris buildup. Inspect for water stains and seal any leaks with high-quality roofing sealant. Regularly check cracks and seal them properly to prevent expansion. Address blisters by cutting them open and allowing the area to dry before sealing. For mold, clean with detergent or a diluted bleach solution. Finally, clear debris regularly to avoid moisture buildup and guarantee proper drainage. Learn how to tackle each one effectively.
Leaks and Water Damage
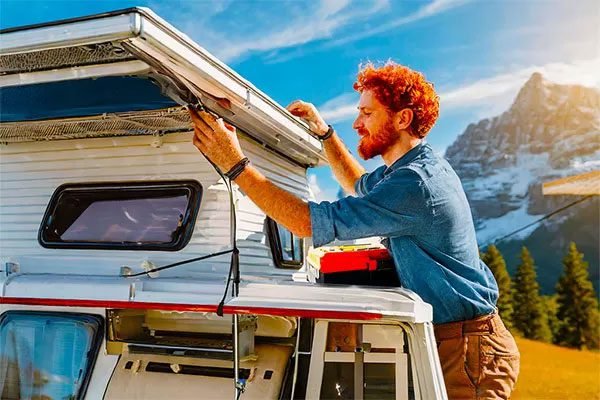
When you notice water stains on your RV’s ceiling or walls, it’s crucial to address leaks and water damage immediately, as ignoring them can lead to more extensive issues. Start by inspecting the roof seams, vent covers, and skylights for signs of wear or deterioration. Use a flashlight to identify any potential entry points. Once located, clean the area and apply a high-quality roofing sealant to seal cracks or gaps effectively. For significant damage, you might need to replace affected panels or insulation. Guarantee proper ventilation to prevent mold growth, and regularly check your RV’s roof after rain or during maintenance. By taking these proactive measures, you can protect your investment and maintain a safe, comfortable living space in your RV.
See also: Resources and Services for Successful Business Operations


Cracks and Splits
Even a small crack in your RV roof can lead to significant problems if left unaddressed. These cracks can allow water infiltration, causing structural damage and mold growth. To identify cracks, inspect your roof regularly, focusing on seams, edges, and around vents. When you find a crack, clean the area thoroughly with a mild detergent and water, then let it dry completely. Use a high-quality sealant designed for RV roofs, applying it generously over the crack and feathering the edges to guarantee a strong bond. For larger splits, you might need to reinforce the area with a patch made from the same roofing material. Always follow manufacturer guidelines for materials to maintain your roof’s integrity.
Roof Blisters
Roof blisters can develop over time due to heat and moisture buildup beneath the roofing material, leading to unsightly bubbles that may compromise your RV’s integrity. To address this issue, first, inspect the roof for blisters, focusing on areas exposed to direct sunlight. If you find blisters, carefully cut them open with a utility knife to release trapped moisture. Allow the area to dry completely before applying a high-quality roofing sealant to prevent further moisture infiltration. For larger blisters, you may need to remove the affected section of roofing material and replace it with new material, ensuring proper adhesion and sealing. Regular maintenance and inspections can help you catch blisters early, preventing costly repairs down the line.
Mold and Mildew
Mold and mildew can quickly become a serious issue for RV owners, thriving in the warm, damp environments often found on roofs. To combat this, regularly inspect your RV roof for signs of moisture accumulation. If you spot any mold or mildew, act fast. Use a mixture of water and mild detergent to scrub the affected areas with a soft brush. For tougher stains, a solution of bleach and water can be effective, but be cautious with the bleach as it can damage certain roofing materials. After cleaning, make sure the area is thoroughly dried to prevent regrowth. Additionally, consider applying a mold inhibitor specifically designed for RV roofs to create a protective barrier against future infestations. Regular maintenance is key to prevention.
Debris Buildup and Maintenance
Debris on your RV roof can lead to significant problems if not managed properly. Leaves, twigs, and other materials can trap moisture, promoting mold growth and damaging roofing materials. To prevent this, conduct regular inspections every few months, especially after storms. Clear any debris using a soft-bristle broom or a leaf blower; avoid metal tools that could scratch the surface.
Additionally, consider applying a protective sealant annually to enhance durability and simplify cleaning. Keep gutters and drainage systems free of blockages to guarantee proper water runoff. If you notice any signs of damage during your inspections, address them immediately to avoid costly repairs. Keeping your RV roof clean and well-maintained is essential for its longevity and your peace of mind.